This post contains affiliate links. I will earn a small commission, at no extra cost to you, if you make a purchase through these links.
Have you been thinking about building a terrarium but keep getting intimidated by Pinterest-esque, expert designs? Well, guess what, creating a terrarium is actually pretty darn easy. The key is to take the time to do it correctly in order to ensure the success of the mini ecosystem that you’re building.
Chances are, you’ll already have some of what you need for the terrarium layers lying around. You may be tempted to take shortcuts here, but don’t! Each part of what I’ll discuss in this post is a crucial component of creating the environment your terrarium needs to thrive.
How Does a Terrarium Work?
Not all terrariums are created equal. Closed terrariums and open terrarium are very different. This post discusses closed terrariums.
A closed terrarium works by creating its own mini, self-sustaining ecosystem. It has its own water cycle. I mean, it doesn’t RAIN inside the terrarium, but the moisture is locked in and you should be able to see some condensation on the lid.
This means that as long as you keep the terrarium closed most of the time, the plant will have everything it needs without you having to do much. You’re basically creating your own little world!
Closed Terrarium vs. Open Terrariums
It’s important not to get the two confused because they are very different! You’re not creating a self-sustaining ecosystem with an open terrarium, so those will still need to be cared for regularly as you would do with any other plants.
Open terrariums are best for plants that don’t need moisture and humidity to thrive. There is a little more leeway here than using a closed terrarium, which absolutely requires moisture-loving plants.
Succulents are popular in open terrariums. You’ll need to make sure to set up excellent drainage for your open terrarium, but that’s the only tricky part about them.
Closed terrariums are a bit more challenging since you’re actually creating a tiny self-sustaining world for your plant to survive in. They are relatively low maintenance in the long run, but you need to make sure that everything is set up correctly in order to get to that low-maintenance point.
You only need to keep the soil moist by adding a couple of tablespoons of water as needed, and open the lid for fresh air every now and then. When a large amount of condensation accumulates, you should open the lid.
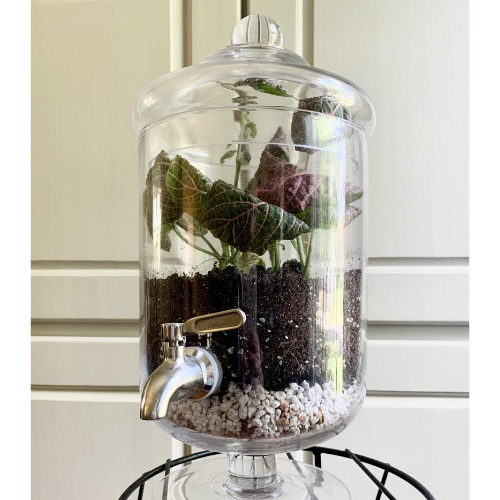
Let’s review, step by step, how to build a successful closed terrarium! Please excuse the glare in these photos, it’s so hard to take nice pictures of shiny glass. But I think you’ll still get the idea 🙂
Supplies List
I’ll explain this all in detail in the following steps, but here is a quick list of supplies:
- A clear glass container like this one
- Drainage, like pebbles and perlite
- Horticultural charcoal
- Indoor plant potting mix
- A moisture- and humidity-loving plant. I chose a nerve plant.
Closed Terrarium Layers and Steps
Step 1 – Find Your Container
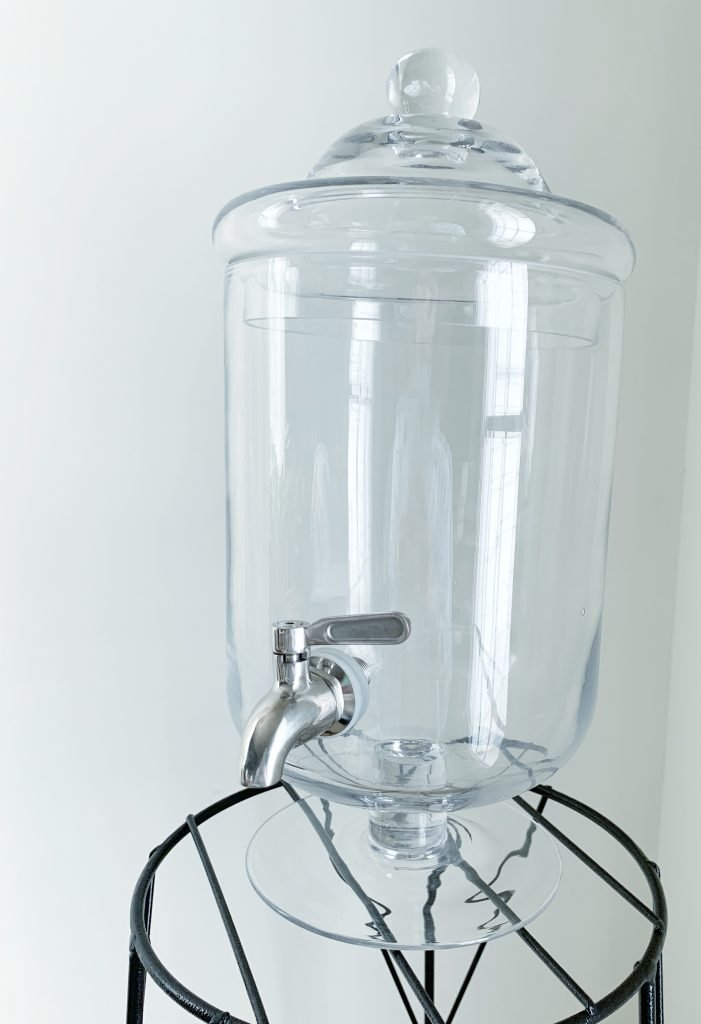
Choose your container and make sure it’s clean. You’ll want your terrarium to look pristine, so be sure to not leave any streaks or watermarks. Your container should have some depth to it because you’ll be putting down a few different terrarium layers.
Also, your container should have a top that’s easy to remove with plenty of space to fit your hands in order to work. I chose this glass beverage dispenser that my boyfriend gave me a few years ago. I always thought it was so pretty but never had the chance to use it.
Below are a few container suggestions that I think would make nice terrariums. It’s important that it has a wide-enough mouth for you to work in, some depth for the different layers, and a removable lid.
It’s a little pricey, but this is the one I was given as a gift.
Here is a nice beginner-friendly option.
This one is a little smaller but has a wide opening which will definitely give you enough room to work in.
Step 2 – Set Up the Drainage

The first closed terrarium layer is the drainage layer. Put down about two-or-so inches of pebbles. I didn’t have enough pebbles so I used a mixture of pebbles and perlite.
Depending on how you want your terrarium to look, you may want to use specific colors of pebbles and be careful to put each layer down evenly. I wasn’t too careful with mine, but I think it still looks pretty nice.
Step 3 – Ensure Proper Air Filtration
The next layer is horticultural charcoal. This was the one component that I didn’t already have lying around, but you really can’t skip this. Horticultural charcoal for terrariums is absolutely essential because it will filter out any impurities and keep your closed terrarium fresh as a daisy. Add a one-inch layer of horticultural charcoal on top of your drainage layer.
Step 4 – Add Your Potting Soil
Add about two or three inches of indoor potting soil to plant in. A normal, well-draining houseplant soil will do fine!
Step 5 – Plant Your Plant
Now it’s time to get planting. Be sure to choose a moisture- and humidity-loving plant such a fern or moss. I chose a nerve plant.
Whatever you choose, the plant should fit nicely into your terrarium, you don’t want it too tight against the terrarium walls. I think the nerve plant I chose was a little on the big side, but it still seems pretty happy after two months in the terrarium.
Step 6 – Add the Finishing Touches
Now that your terrarium is assembled, brush any loose soil off of the plant and the inside glass and add a couple of tablespoons of water to moisten the soil—really, that’s all you need! Try not to get the water on your plant’s foliage though. A turkey baster or eye dropper can come in handy.
If you have more space and want to add some decorative rocks, shells, etc. go ahead, just make sure they’re clean.
Terrarium Maintenance
Put the lid on the terrarium and place it somewhere that receives medium to low, indirect light. It shouldn’t be placed in direct light since the terrarium glass will act as a greenhouse, magnifying the light and hurting your plant. The first photo in this post is receiving direct light but I only put it there for the photo.
You will not need to water this often, so every once in a while check the soil moisture to determine if watering is even needed. I water mine probably every three to four weeks, checking the soil first.
Remember, you only need to use a small amount of water, so water a little at a time and if you see it draining through to the bottom, you’ve used too much. And try not to get the water all over your plant’s foliage.
Remove the lid every couple of weeks for about a half hour, especially when you notice heavy condensation buildup, to provide some fresh air and let out any excess condensation.
Occasionally wipe down the inside of the glass. Don’t use any chemicals for this. A dry or slightly damp paper towel should work fine to remove any excess soil or grime. You want to make sure the glass is clean so that your plant can photosynthesize.
If your plant starts to grow too large for the terrarium, use a pair of clean scissors to prune it accordingly so that it’ll stay comfortable and happy in the space.
Once you have your terrarium all set up, it’s pretty cool to watch the mini ecosystem form and take care of itself. While the thought of taking care of a terrarium is intimidating at first, if you take the time to set your terrarium up for success first, there is little care actually needed! It’s a fun way to add some unique decor to your space and a great project for all levels of plant parents!
Bonnie Crim says
I’m wondering why I saw no mention of spaghnum moss? Others seem to think that it’s quite necessary. I’m confused!Thanks! Please rsvp
Julie, Houseplant Expert says
Hi Bonnie – I don’t use sphag moss in my terrariums. I’m sure it’s helpful though!